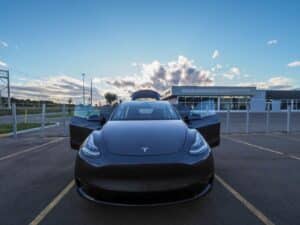
With my Model Y finally (finally!) out of the shop, I can press on with plans to modify and improve my ride. One of the first things on my list is to install EV Mud Flaps. In this post, I will break down just that including tips on the install, my overall impression, and why I think you need them on your Tesla Model Y.
Why You Need EV Mud Flaps on Your Model Y
As highlighted in my post on the Tesla Model Y issues and the accessories that fix them, the paint quality on the Model Y (and Model 3) is questionable, to say the least. Things were so bad for the Model 3 that there is a class action lawsuit underway.
Sadly, Tesla did not improve their paint quality with the Model Y. Pair that with a design that kicks road debris off the side panels and your new Model Y is going to look rough very fast. I noticed plenty of rock chips after just 2,000 km, and I had only been on a couple of non-paved roads. I can’t imagine what those in cold climates or rural locations look like.

The problem is so bad that Tesla started selling paint protection film (PPF) specifically for the affected areas. Although a good start (really, should be free considering the flaws), this only protects the area. To minimize the debris that gets blasted off the sides you need mud flaps. That’s where Antirouille Bolduc and his EV Mud Flaps come in.
About EV Mud Flaps
Antirouille Bolduc (Eric Bolduc) is no starnger to protecting cars. Eric has been doing quality anti-rust treatments for 20 years and, in the last few years, has been specializing in Tesla vehicles. While working on his first Model 3 he saw weaknesses in the fender design and the need to protect the galvanized steel rocker panels.

Eric has always installed mudflaps on his Teslas (Model S then Model X) as they are wider at the back. This means all road projection is directed to the rear. The same goes for the Model 3 and Y.
Eric analyzed and designed EV Mud Flaps to correct the weaknesses of the Model 3 and later the Model Y.
Why Choose EV Mud Flaps Over Others?
On top of offering PPF, Tesla (along with others) introduced their own mud flaps. So why choose EV Mud Flaps?
The material used is, reportedly, unbreakable. On top of that, being located in Quebec, Canada, Eric has used the harsh winter conditions to put them to the test. They will roll, twist, but never break.
The EV Mud Flaps for the Model 3 have sold all over the world with countless glowing feedback from Canada, Norway, Sweden and France.
You can see Eric in the interview video below talking about why you need mud flaps on a Model 3.
How to Install EV Mud Flaps
The installation is fairly basic, even for someone like me that is more into tech than cars. That said, there are some tools and tips to make your install go smoothly:
- Right angle drill bit attachment to get at screws – a must!
- Small nail puller – also a must!
- A heat gun (or hairdryer) to heat clips
- A small bowl or can to heat the clips in
- Hammer to press clips in (I used side to press, not hammer)
- blanket or cushion to kneel on
- Turn the front tires for clearance as required


Included in the EV Mud Flaps package are the mud flaps, screws, and clips. There is also a card with a link to an installation video.
Step 1: Remove Old Clips

Using the nail puller, remove the two closest clips in the wheel well. Interestingly for me, my front wheels were missing these clips. Gotta love that Tesla build quality!
Step 2: Install New Clips
Next, line up the mud flap with the textured side facing out and install the new clips. Using your heat gun (or hairdryer), heat the clips for a few seconds. I suggest doing this one at a time.

Now, I had a very hard time pressing some of these clips in. In the video, the insaller uses the side of his nail puller and it pops in with ease. For me, not so much.
The wheel well moved which made it tricky to press in and, some of the holes did not line up straight. Again, this is a Tesla build quality issue and may not be as bad on newer Model Y’s. To press in, I used the flat side of a hammer. It took some force (and swear words) but I was able to get them in.
Step 3: Secure with Screws

Once the clips are in, line up the top of the mud flap with the trim and secure it with the provided screws through the pre-cut holes. Use the right-angle drill bit and lightly apply force as you drill in.
My Thoughts on EV Mud Flaps

Despite the installation being a little tricker than led to believe, I am happy with the finished product. Although there is not much to them, I like the look, especially on the back tires. That said, they don’t match the greyish wheel well so stick out a bit in that sense. I think a better colour match would be ideal but not a deal-breaker.


The functionality can’t be understated though. Since installing, I have taken a couple of country roads to test it out and can see from the mud splatter (or lack of) that they are definitely doing their job. I highly recommend it for any new Model 3 or Model Y owner. My only regret is not installing them on delivery day!
Where to buy: $130 CAD for set of four mud flaps at evmudflaps.com

SAVE ON A NEW TESLA!
Thinking of buying a Tesla? Use this referral link to get up to $1,300 off!*
*As of August 2024, Tesla has reinstated its referral program and introduced attractive financing options!
They suck bigtime and overpriced
They are definitely more expensive but they seem to do the trick
your comment suck big time .
that was for Steven Auto
????
The rear ones fit great, but fronts scrape off everything so easy. I’ve had to trim a fair bit off.
Interesting I haven’t noticed that with mine.
Pingback: หาแม่บ้าน
Pingback: altogel
Pingback: grd plus
Pingback: ทัวร์ฮ่องกง