*Note* This Tesla Massage Seat Module is no longer available for purchase.
In 2014 I ruptured a disk in my back. It sucked to say the least. Even more so as it was right before taking a year-and-a-half off work to focus on my travel site. Despite the setbacks and pain, I was able to travel and coped by frequently standing on long flights. Now, with travel restricted largely to driving, I no longer have this luxury to get up and stretch. So, when I found out there is a Tesla massage seat module I couldn’t wait to give it a go.
This is my review complete with tips on how to install one in your Tesla Model 3 or Model Y.
What is a Tesla Massage Seat Module?
This Tesla massage seat module is curtesy of Hansshow, a Tesla accessory company from China. They make a lot of great mod kits and allow you to add interesting features like a power frunk, soft closing doors, and hands-free liftgate sensors.
*If you are interested in trying out this massage module or the powered Frunk, get 15% off with promo code “MYEVTRIPS”
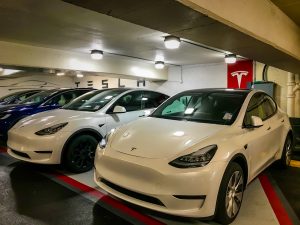
This Tesla massage seat module is available for the Model 3 and Y and is super smart. It installs in line with your current seat controls and leverages the air bladders in your seat to create a massaging effect. It uses the USB power system and, with the tips I outline below, installation takes about an hour.
Installing a Tesla Massage Seat Module
Now I say this install takes about an hour however it took me significantly longer. The instructions aren’t great and miss a couple of time-saving tips. That’s where I come in.
Note: If you are not comfortable with this installation Hansshow does have certified techs in major cities. You can see their listing here.
Required Tools

The Tesla massage seat module does come with all tools you technically need to install, however I recommend the following to make things easier:
- 90 degree T20 Screwdriver (the kit comes with an Allen key. Throw this away.)
- Small Flat Head screwdriver
- Velcro (I prefer this to tie wraps)
- Cardboard or blanket to kneel on
- Light source (I used a USB one and my phone once I cut USB power)

Step 1: Remove Seat Side Guard

This is by far the hardest part of the install, or at least for me. Getting at the set screw under the seat takes some work. What makes it easier is having the 90-degree screwdriver and raising the seat. Without raising the seat there is a bar blocking the screw making it next to impossible to access. Ask me how I know. ?♂️
With the set screw removed, pull back on the trim to reveal the seat controls.
Step 2: Connect the Wiring Harness to the Seat Controls

Next up, remove the cable connecting the seat control. This is done by using a flat head screwdriver to gently release the visible tab. Once out, jiggle (not pull) the harness free.
Once removed, connect the wiring harness connection in its place. Connect one cable to the seat controls and the other with the original harness (they only fit one way). This puts the Hansshow harness in line.
Note: There’s only one connector that will fit each of these. Look for the tabs to line up the connections.
Step 3: Remove Rear Centre Console Trim

Using the provided pry bar, remove the trim directly below the rear USB connections. I started in the corners then top middle. It takes a bit of force but pops right off.
Step 4: Connect Power & Massage Module

Once the trim is removed, unclip the lone blue connector and add the Tesla massage seat module harness in between.
Note: There are two unused cables on the power side of the harness. These are for older Model 3’s that require you to tap into the USB power behind the back vent trim. For newer Model 3’s and the Model Y, disregard these and tuck away.
Next, find the white harness clip and run this to the Tesla massage module and connect.

Step 5: Test the Module
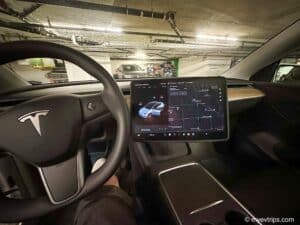
Before going through the effort of putting everything back together, it’s a good idea to test the module first. Double-clicking “down” on the round directional button (last of the three-seat control buttons) you should hear three beeps. This indicates the module is working and you should hear and see the lumbar air bladder moving in the seat.
Before moving on, test that the other seat controls are functioning normal. Also check all the USB plugs to ensure you are getting power.
READ MORE: My Favourite Tesla Model Y Accessories So Far!
Step 6: Cable Management
Now that everything is tested and the trim is back on, time to address the bundle of cables under the seat. The kit comes with some double-sided tape and tie-wraps however I used velcro and attached the cable to the bundle of cables already under the seat. I then tucked the module and remaining slack on the backside of the seat cover which is fitted under the seat.
Step 7: Re-attach Console and Seat Trim
So I said getting that seat trim screw out was the worst of it however cramming everything back in the rear centre console is no fun either. I initially tried to neatly conceal the new harness however after minutes of struggling to make room, I finally forced the back trim on. Be carful not to pinch and of the cables and run the lone cable connecting to the seat out the bottom back of the trim.
The driver trim is easier to get back on. Start with the backside and then press the middle tab in place. Once done, fasten the set screw using the 90-degree screwdriver.
Step 8: Enjoy!
Once everything is back together you are going to need a break. All that contorting and bending over really took its toll on me. Coincidently, your reward is a Tesla back massage!
Run the seat through your driver and Easy Entry profile and ensure the wires are not snagging or being pulled tight. Once verified, have a seat and give the massage a try! Double-clicking down will engage the system for three minutes. If you want to shut it off before that, simply hold the down button for half a second. You will hear a beep signalling the end of your massage session.
Try For Yourself and Save
Despite the install taking a little longer than expected, if you know some of the tips outlined here this should be a breeze. Again, the worst parts are the instructions, the set screw, and putting the panels back on.
As for the Tesla massage seat results, as expected, it’s decent, not great. Of course, this is not going to be like a Japanese massage chair, but for the price and minimal effort, it does a great job. I took a test drive after my install and, and despite not thinking it was doing much when I got out I could definitely feel a difference in my back! I highly recommend for anyone taking long road trips or for someone with a back issues like me!

I got what you intend,bookmarked, very nice internet site. Lucia Yehudi Pellet
Some really nice and utilitarian info on this site, too I conceive the pattern has great features. Stormy Jeremy Isabeau
Really nice style and design and superb articles , very little else we need : D. Mariellen Trefor Debi
The details mentioned in the write-up are a few of the best readily available. Milka Grannie Kester
Thanks!
Nice Post Enjoy Our Computer City With Fastest Ram Processor Thankyou. Aggy Eugenio Leffert
Cheers!
Hello! I could have sworn I’ve been to this blog before but after browsing through some of the post I realized it’s new to me. Anyways, I’m definitely happy I found it and I’ll be book-marking and checking back frequently!
Thanks. More to come!
Hello Shaun,
great installation guide!
I have a Model 3 2022 and unfortunately I bought a massage module for a pre-facelift model (with USB-A instead of USB-C).
Any idea I can still install it in my newer model?
I suggest reaching out to Hanshow. It sounds like they have discontinued this product so not sure how much luck you will have.