Wondering why your Tesla AC smells bad? It’s time to check your air filter.
One of the perks of owning an electric vehicle is that they are incredibly low maintenance. Since there is no combustion engine, maintenance on many electric vehicles is limited to replacing tires and windshield wipers. Even the brakes are low maintenance thanks to regenerative systems. That said, one routine item is constantly overlooked by owners, including myself.
Scrolling through Facebook groups and Tesla forums I noticed a common theme of people wondering why their Tesla AC smells bad. Aside from the odd pet problem, this question always comes down to dirty air filters. To my surprise, many of the answers from those in the groups were to take it in for service. Strange as it is relatively easy (and affordable) to replace Tesla air filters.

With that in mind, I thought I would share how to do just that. Here are the steps and tools required to swap out that smelly Tesla Model 3/Y air filter.
What Do You Need To Replace a Tesla Air Filter?
Replacing a filter in a Tesla Model 3 or Model Y is very easy. Still, there are a few things you need to make it as smooth as possible;
- Replacement air filters
- Clip pry tool
- Torx 20 bit or 6mm socket bit*
- Foam Cleaner
- Blanket or knee pads
- Light source
*The process for Model 3’s and Model Y’s are largely the same however, depending on the year, you will need to remove a socket head screw or torque head screw. I was changing the filter in my 2020 Model Y and needed the socket. I believe newer models use the Torx bit.
What Type of Tesla Model 3/Y Air Filter Do I Need?
Tesla Model 3 and Model Y use two air filters for their climate control system. On my replacement, I used this as an opportunity to upgrade the filters to ones that include charcoal to further help filter out odours. You can find several versions online however I went with Basenor’s offering. It is listed as having a removal efficiency of fine particles above 0.3 microns at more than 99.7% and upon receiving I could tell it was defiantly beefier than the ones that came with the car. I have also enjoyed Basenor’s other accessories and their HEPA filters come bundled with a pry bar and Torx bit. At $31.99 USD for two, it’s also an affordable upgrade.

Basonor also offers a standard filter pack for $24.99 USD. Be sure to check if they are compatible with your make/model/year before purchasing.
How To Change Your Tesla Model 3/Y Air Filter
Alright, now that you have your filter and tools, let’s get started.
Step 1: Prep the Space
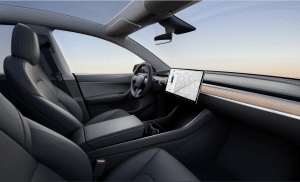
The cabin filters are located inside the centre console on the passenger side. Ensure you have space to work on the passenger side as well as a good light source before beginning. Remove the floor mats and turn off the climate control system. Next, move the passenger seat back all the way to allow room to operate. Last, save those knees by laying out a blanket outside the door.
Step 2: Access the Filters
As mentioned, the air filters in the Tesla Model 3 and Model Y is located in the passenger side foot well at the front of the centre console. To access them, use the pry tool on the carpeted wall to remove the panel. Start in the top left corner and pry the panel off. Work your way around, releasing the clips as you go. After you get a couple of clips off and can get your hand behind the panel you can pull the rest off without the tool.

Next, remove the panel under the glove box. There are four fasteners that can be pried off using a nail puller or the pry bar. Be careful not to damage or break them.

Once the fasteners have been removed the panel will drop down. Unclip the cables connecting the speaker and light then set the panel aside.


Last, remove the air filter cover. Depending on the version and year of your car this will require either the 6mm socket bit to the Torx 20 bit or key that came with the Basenor filter kit. I was changing the filter in my 2020 Model Y and needed the socket. I believe newer models use the Torx bit.
Optional: Foam Cleaner
For extreme situations where your Tesla AC smells bad, it is suggested to clean out the system with a foam cleaner. I did not do this on this change but will definitely do it on the next. Lubegard 96030 Kool-It Evaporator and Heater Foam Cleaner comes recommended by other Tesla owners and is rated very high on Amazon. The application is simple enough too, with the old filters removed, empty the can in the system by inserting the tube into the filter slot. Be sure to have a tray or mat under the car to capture the runoff of the foam.
Again, if your Tesla AC smells bad, for just $13, this is an affordable step to truly clean out your system.
Step 3: Replace the Filters
The Tesla Model 3/Y cabin air filters are stacked on top of each other. With the door removed you will see a tab sticking out which is attached to the top filter. Carefully remove it as to not bang out the dust and debris captured in the filter.

Pulling out the top filter will reveal the tab to the bottom one. Pull this one up then out to remove.
Step 3: Install New Filters

To install the new filters, slide them in one at a time with the pull tag at the top. Ensure the first one drops down so the new one can slide in on top.
NOTE: The Basenor Hepa Filters need to be installed with the charcoal side facing towards you/the rear of the car. This is well labelled on the filter.
Once the air filters are installed, screw the cover back into place. It took me a couple of tries to ensure the tags were tucked in. After that, reinstall the glovebox panel and then the centre console side panel. Make sure the panel pins are lined up before banging the surface with your hand. This will prevent damaging the pins.
How Often Should I Change My Tesla Filter?

It is recommended to change out the Tesla air filter every two years however, based on my experience, I would say 12-15 months max. I left mine for close to two years and, as you can see by the photos above, this was too long. I noticed the smell probably 16-17 months in.
Tesla AC Smells Bad? Not Anymore!
As you can see from the old and new filter photos, swapping them out was long overdue. After running the AC system for a couple of minutes I could already tell that this fixed the odour issue. I can’t believe I left it this long and will be setting a reminder going forward now that I know how easy it is to change out.

So, if you are wondering why your Tesla AC smells bad, rest assured that resolving the problem is affordable and easy. If you are even the slightest bit handy then there’s no need to book an expensive service appointment!
Where to buy: Basenor replacement air filter kit on Amazon.
If you are thinking about placing a Model Y order, be sure to use my referral code and get 1,500 Super Charger kilometres!
*As of Sept 2021, Tesla has put a pause on referrals ???? I will update if/when they reinstate it.